Webhooks
Before starting the Webhook configuration, make sure that the Adyen app is already properly installed and configured in your VTEX store account.
Without the prior installation of the app in VTEX, communication will fail and you will not be able to successfully complete the Webhook Test step (mandatory step for integration validation).
The webhook configuration is needed so Adyen can send Adyen payment status updates to your VTEX account.
For further information, please refer to the Adyen Webhooks documentation.
To configure the webhook, please follow the steps listed below:
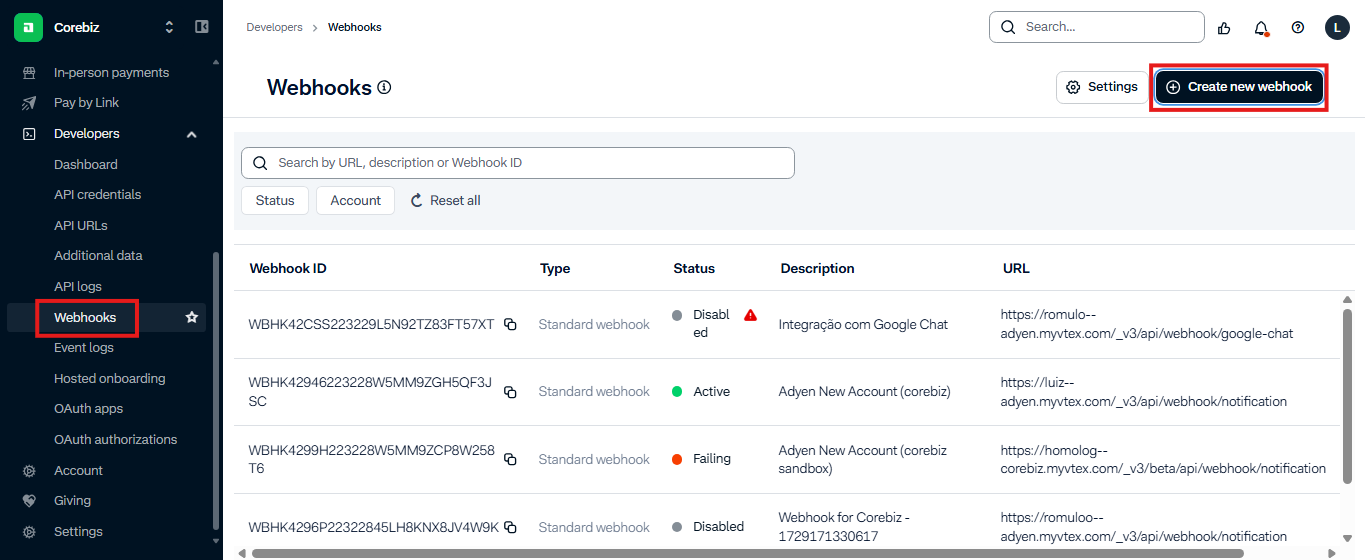
- Open your Adyen Customer area;
- In the left side menu, go to Developers and then Webhooks.
- Click on the button “Create new webhook” on the right side of the screen.
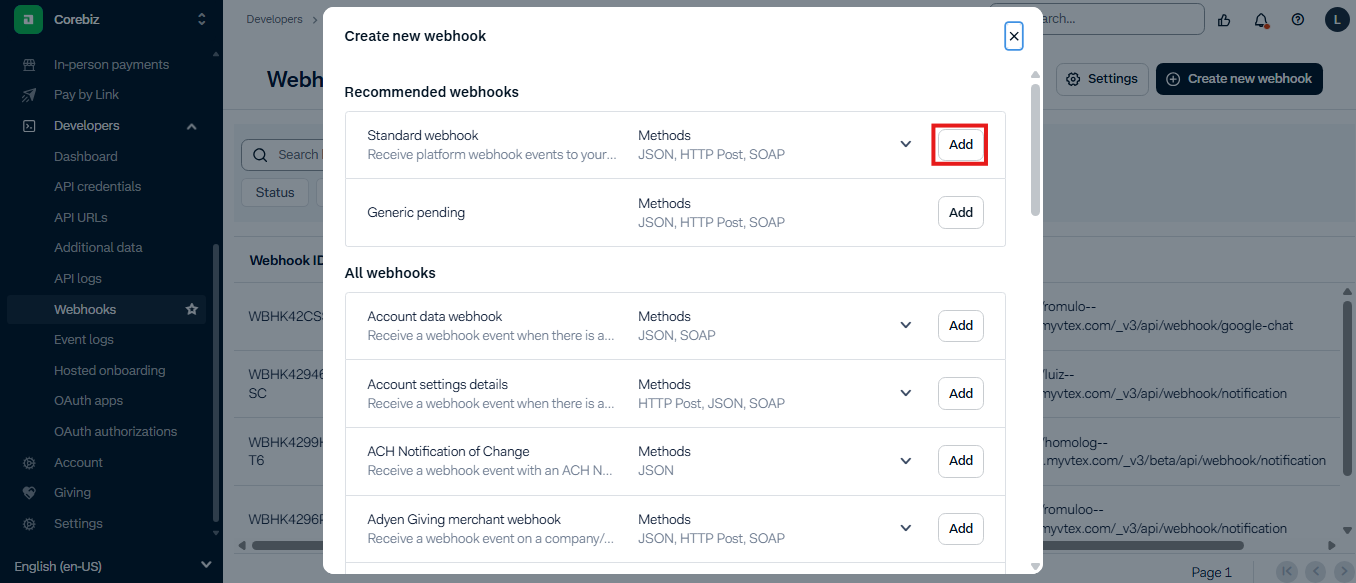
- Click on Add for the Standard Webhook section.
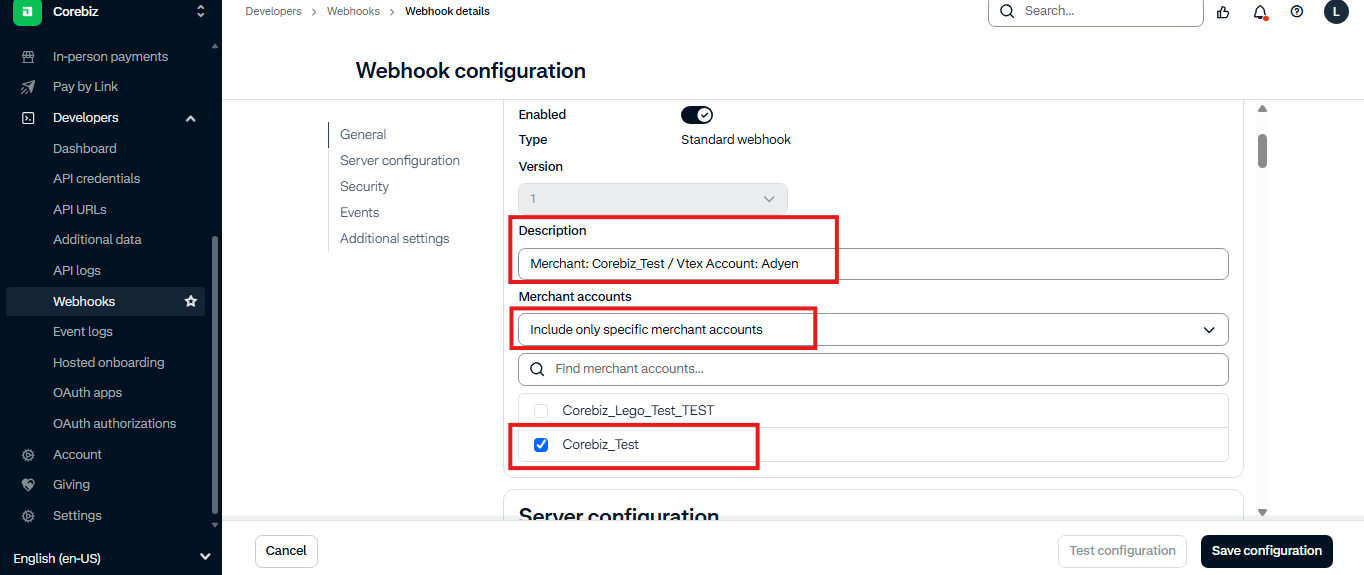
General
Set a description that helps you to identify the merchant account and VTEX account. In Merchant Accounts field, set “Include only specific merchant accounts”. A new section is going to appear, select the desired merchant account.
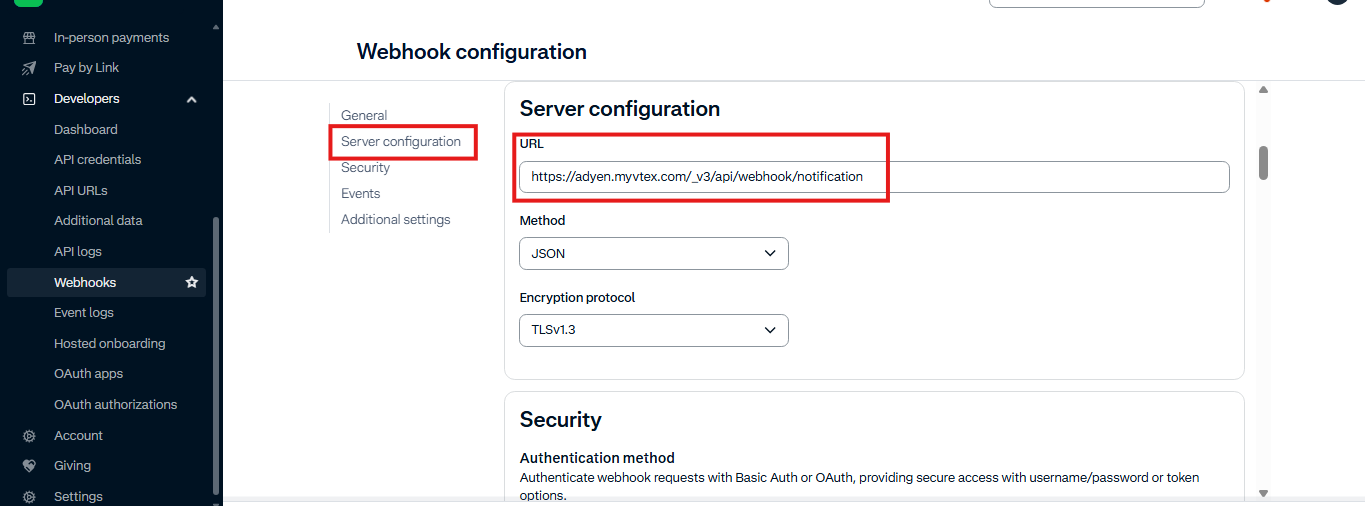
Server Configuration
In Server configuration set the URL like this, replacing {{accountName}} with your VTEX account name:
https://{{accountName}}.myvtex.com/_v3/api/webhook/notification
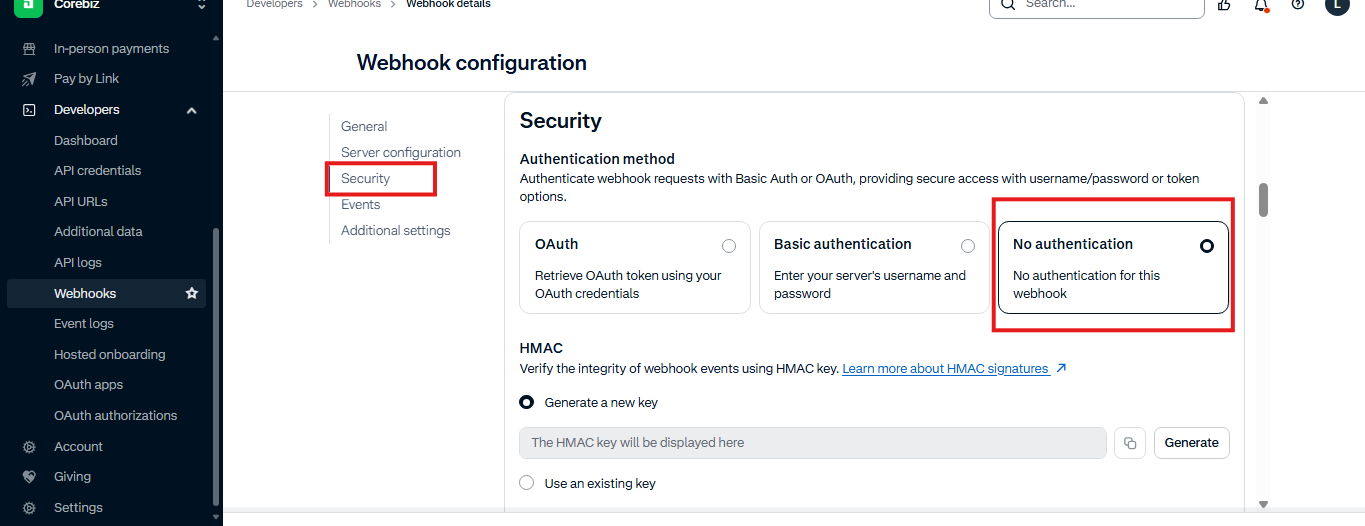
Security
Select “No Authentication”.
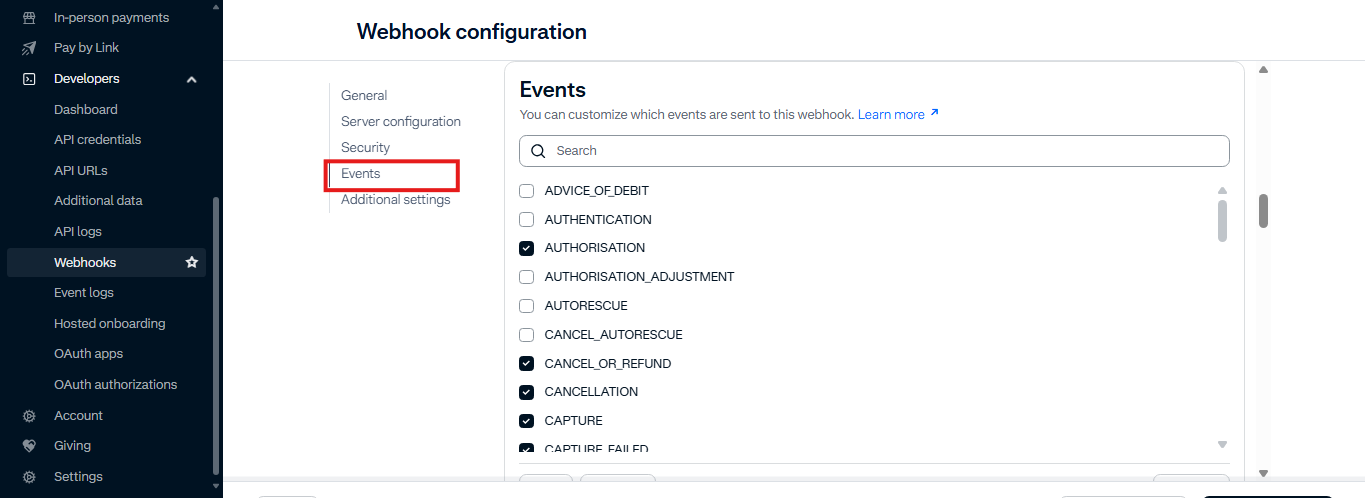
Events
Check the following flags: AUTHORISATION / CANCELLATION / CANCEL_OR_REFUND / CAPTURE / CAPTURE_FAILED / MANUAL_REVIEW_REJECT / MANUAL_REVIEW_ACCEPT / OFFER_CLOSED / REFUND / REFUND_FAILED
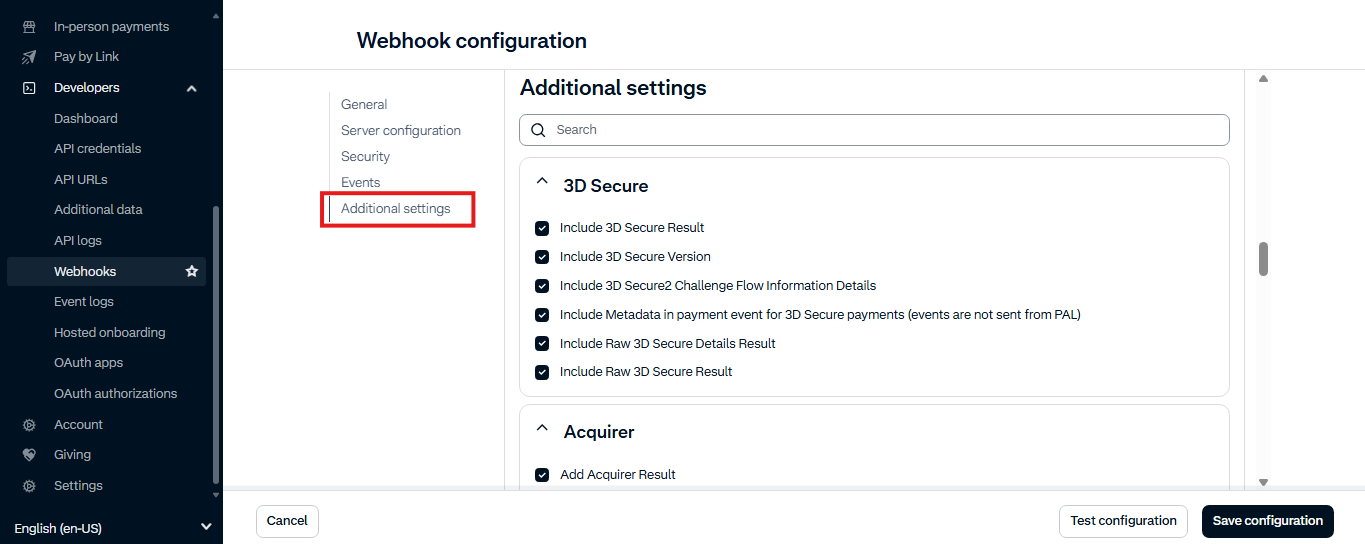
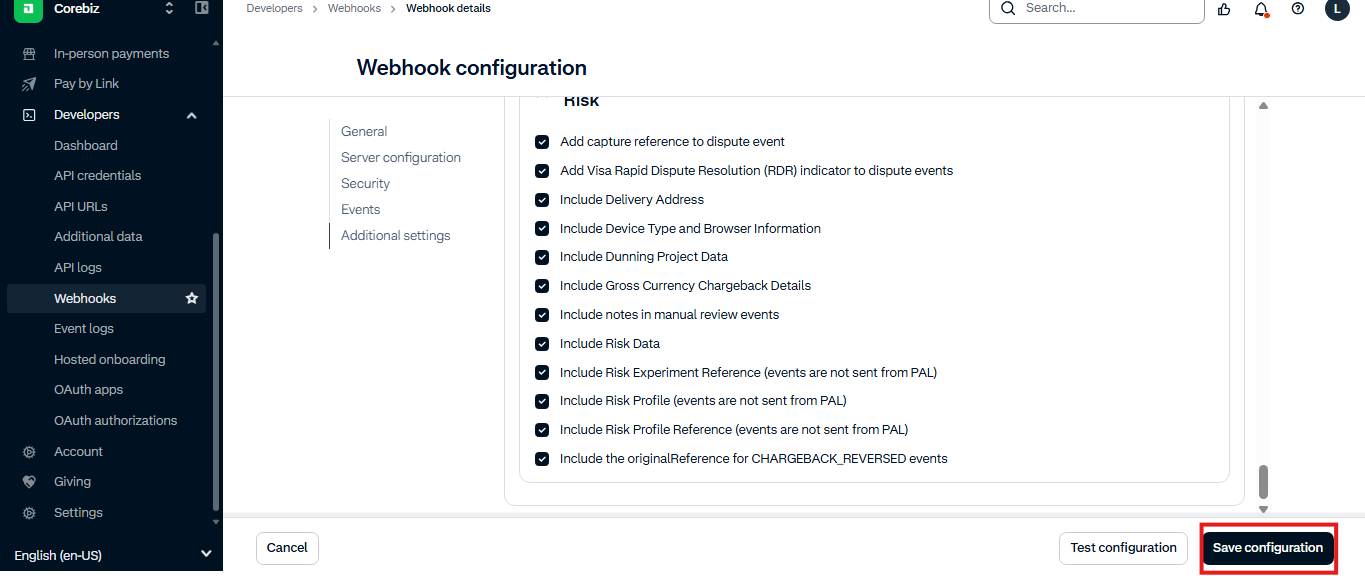
Additional settings
Check all flags in every section.
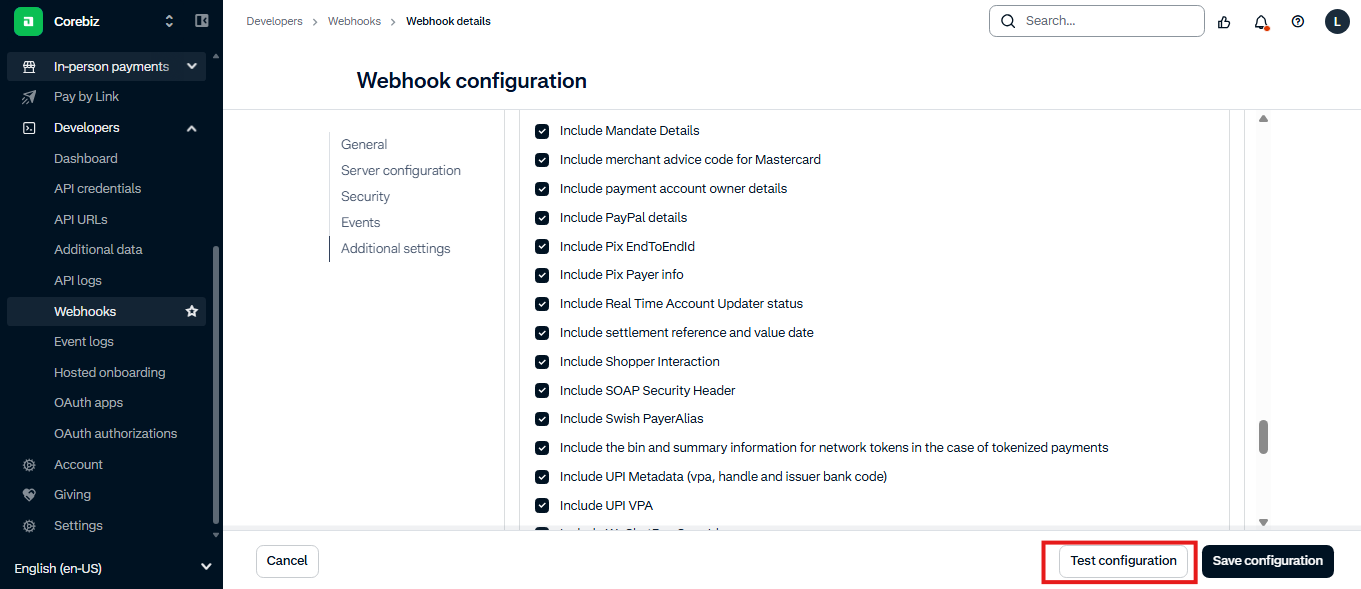
Testing the webhook
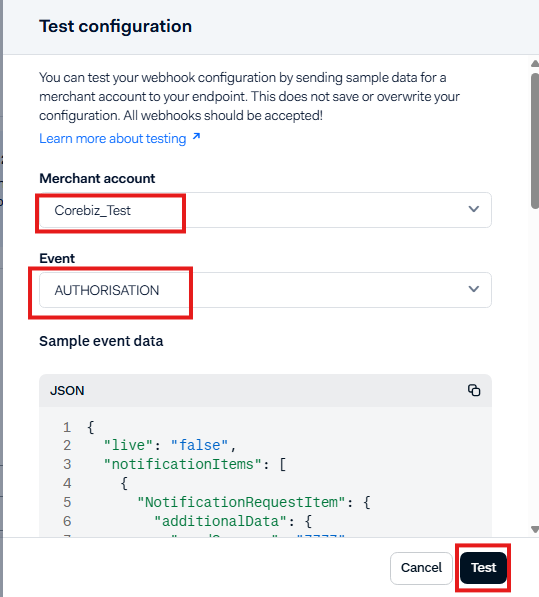
Click on ‘Test configuration’.
Select the merchant account and AUTHORISATION event, then click on ‘Test’.
Results comparison
If you receive a ‘200 - OK’ response, your webhook is almost done. If you didn’t receive ‘200 - OK’, it means something is wrong in the configuration. Check all steps again, mainly your webhook URL set in the Server Configuration section.
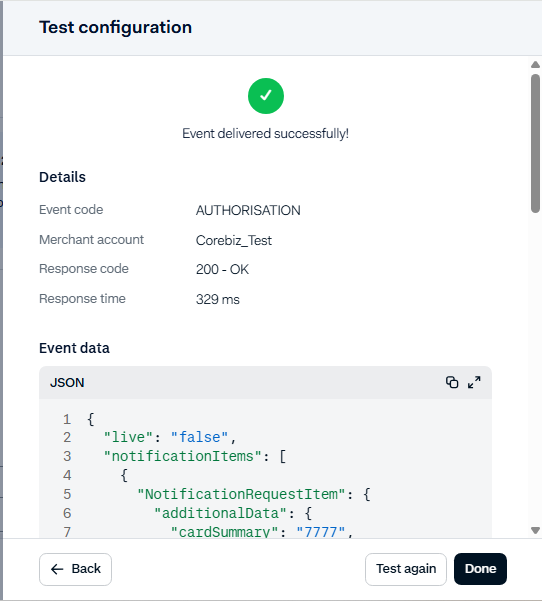
Success: 200 OK
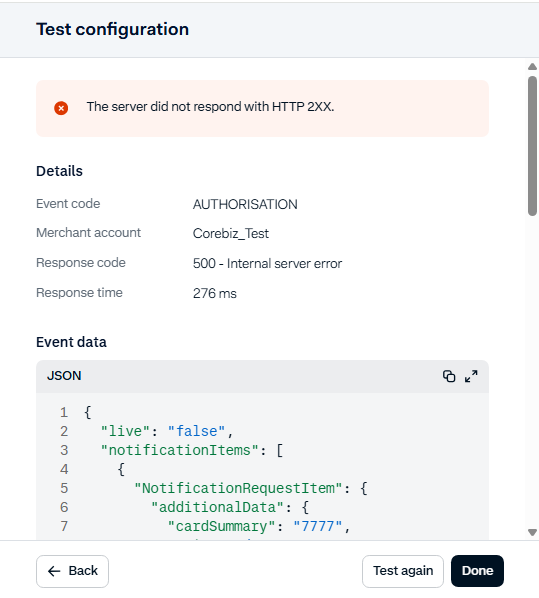
Fail: Configuration error
Save Configuration
Finally, click on “Save configuration”.
Important: It is required to configure one webhook for each store, so if you have more than one store, repeat the configuration steps for each one of them.